Creating a Meeting
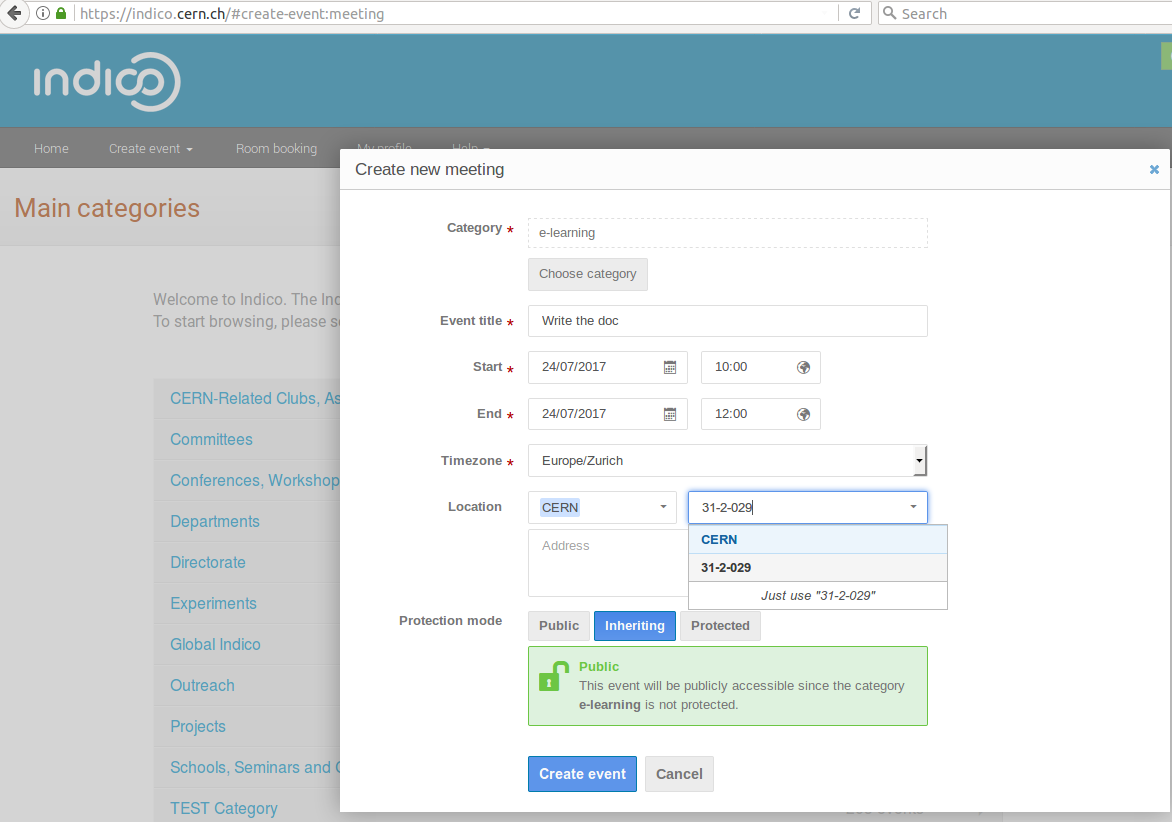
First of all, make sure that you are in the Indico page and that you are logged in. Click on the tab Create event, and click on Create meeting. Click on Choose Category to select the category that you want. You can type in the one that you are looking for and click on Select once you have found it.
Type in the Title for your meeting and choose the start and the end date and duration (timeframe and timezone) of your event.
You may choose the Location of your event. Depending on your installation you may be offered a list of meeting rooms to choose from. Please remember that room reservation has to be done separately!
Select your Protection mode. By default, this is set to Inheriting, meaning you will inherit the rights from the category your meeting belongs to. You may wish to change the default for your event, e.g. you can select “Protected” for your event (even if it belongs to a Public category, if you want the meeting to be visible to a selected few only(like the category managers and the users you will give access to).
Once you are finished, click on Create Event.

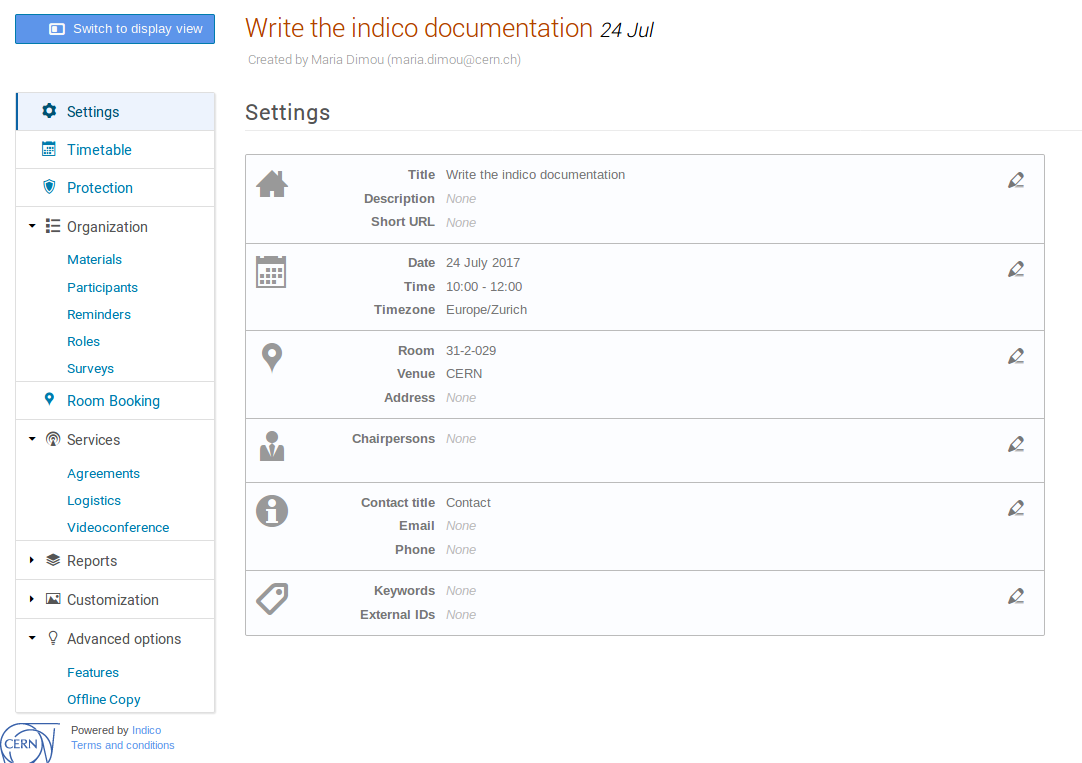
You are now offered a page, where you see the parameters defined of your meeting, which you can change by clicking on the pencil on your right. You are advised to add a Description. Click on Save to confirm.
Add chairpersons by clicking on the pencil on the right under Chairpersons. You can add existing users, by clicking on Search and typing their name. If the person exists, you can select and add them. Otherwise or in addition, you can manually insert users you want to include, by typing in their name and email address. The email is mandatory.
Once you have chosen your Chairpersons, click on Save. The chairpersons appear, by default, as Submitters.

Click on Switch to display view and check if all the details of your meeting are correct.
More event actions
From the event management page, click on the gear icon on the top right to see how to Move, Lock, Delete or Change type of your event, e.g. from Meeting to Lecture.