Setting up a Survey
First, you will have to login in to Indico and create an event that matches your needs (meeting or lecture or conference). To learn how to do this, please see the relevant sections in this documentation.
On your event management page, accessible by clicking on the pencil on the top of the event display page, select Surveys, which is under Organization on the left banner.
Click on Create Survey to start the Survey definition.
Choose a Title for your survey and fill the introduction box with some text you want to be shown as a description.

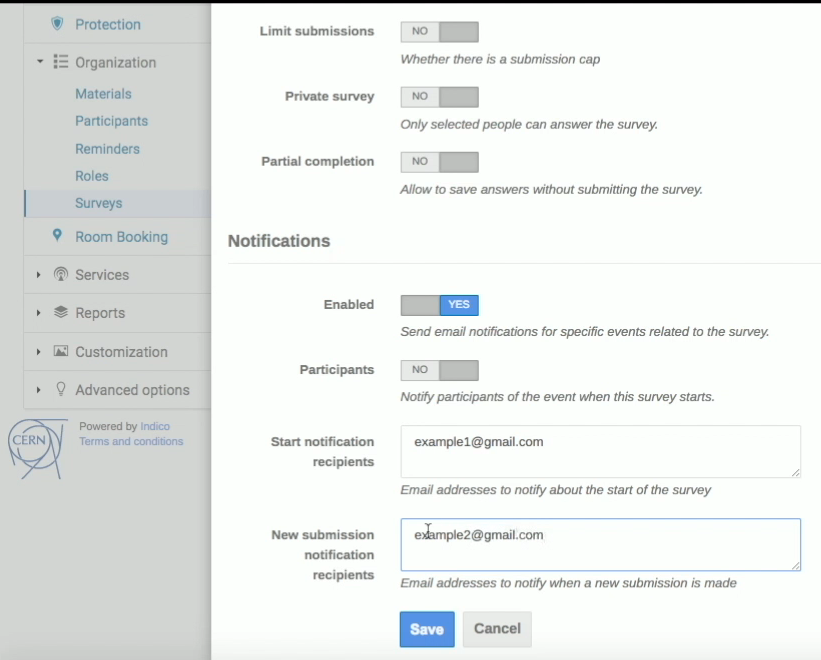
Decide whether you allow Anonymous submissions or not, if you want to put a limit on the number of submissions accepted, if you want to make the survey public or reserved for a selected few, and whether you allow a partial completion of the survey,
Decide whether you want to enable email Notifications related to the survey. If you select YES, then type in the email addresses of the users who will receive these notifications in the appropriate boxes, the first box for when the survey starts, and the second one for each time the survey is filled by a participant. Write one email address per line, no separators are accepted.
When you are finished, click on Save.
Create the questionnaire
To do this, click on Manage, and then on Prepare questionnaire.
You can either import an existing questionnaire, or define a new one.
You may divide your questionnaire in sections. Sections contain questions and questions will show up within the corresponding section, except for those in the "Standalone section", which will show up at the top level.
For each question, you can choose a different modality, such as multiple choice, a "yes" or "no" answer, and so on.
While creating a new section, by clicking on Add section, decide whether you want a standard section, or a standalone one.
Type in the Title of your section and a Description explaining what you are asking the users to do.
Click on Save and the section will be displayed.
Time to add some items to your section.
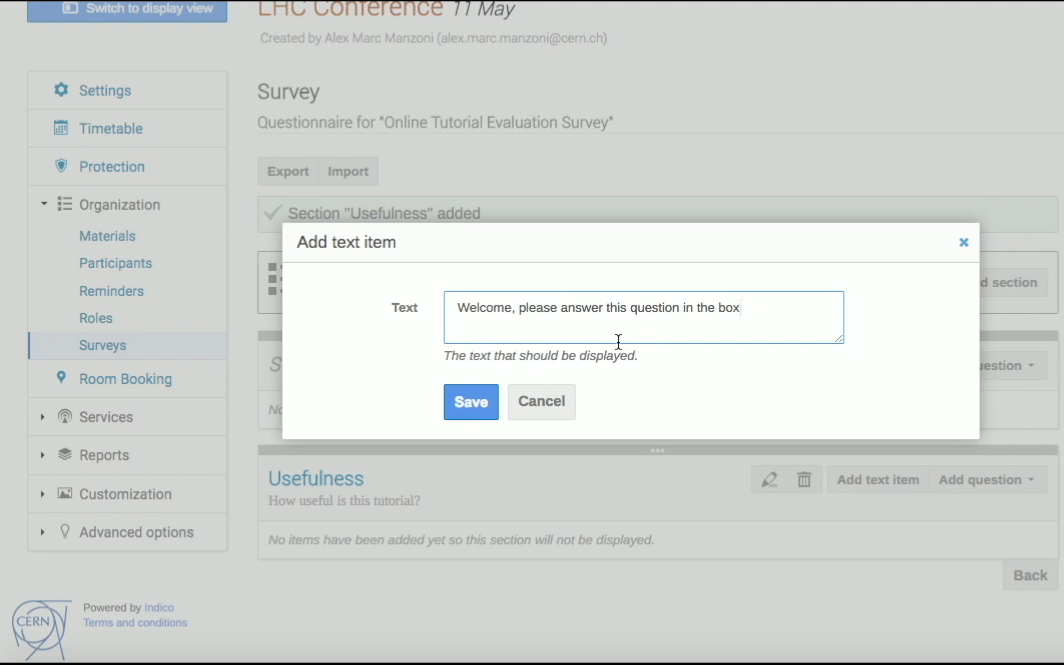
You can click on Add text item if you want to include an item that only contains your informative text. Otherwise, you can add one of the actual questions that the survey participant will have to answer.
In the Add text item pop-up write your prompting text in the box. Click on Save in order to show the text item in your section.
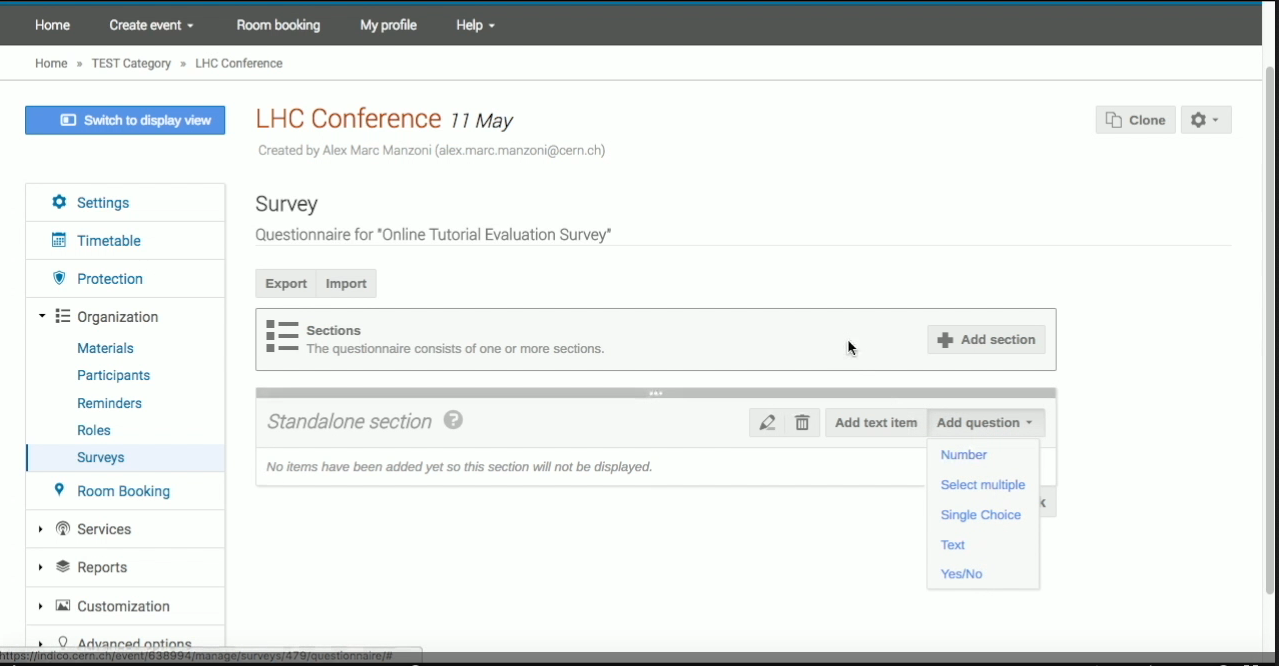
Click on the tab Add question and select the question modality that suits your needs, e.g. Single choice question, as per this figure:
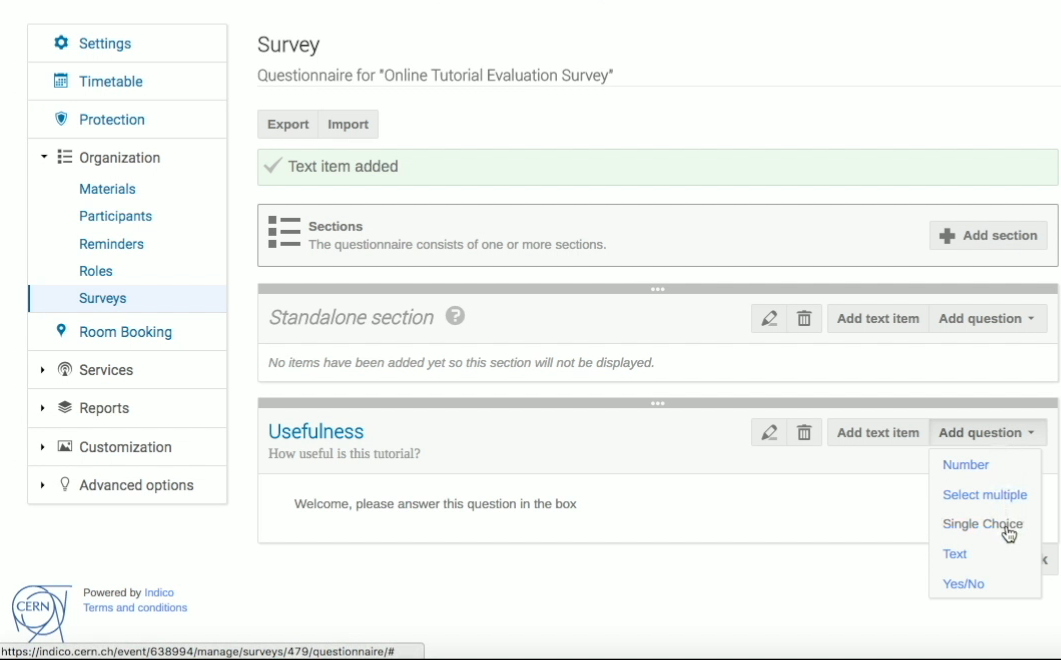
This means that the user will be able to select only one from the available options.
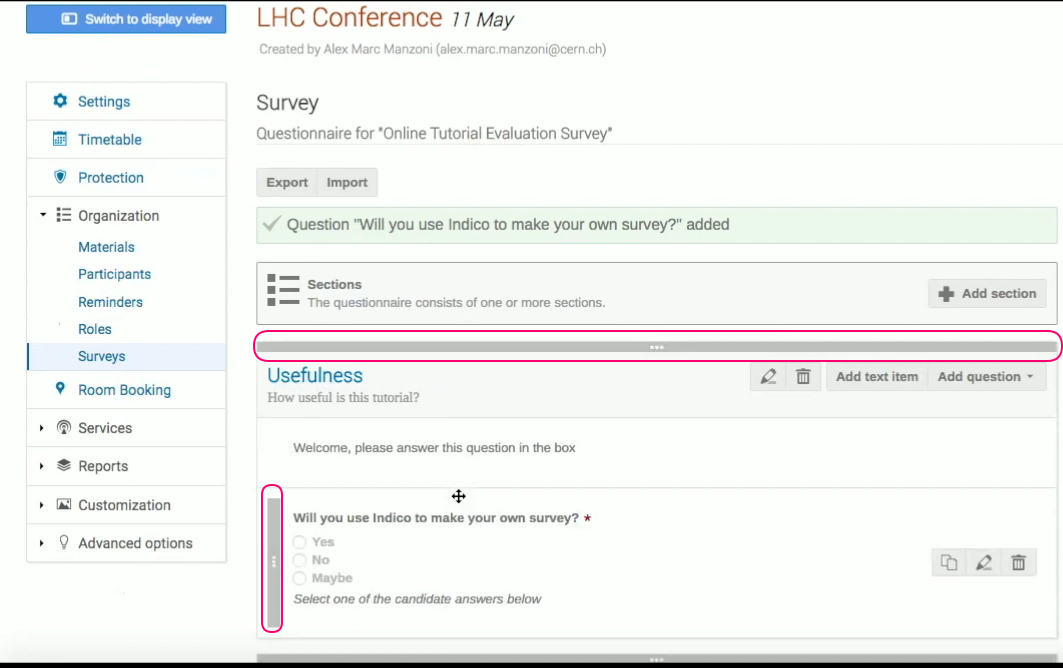
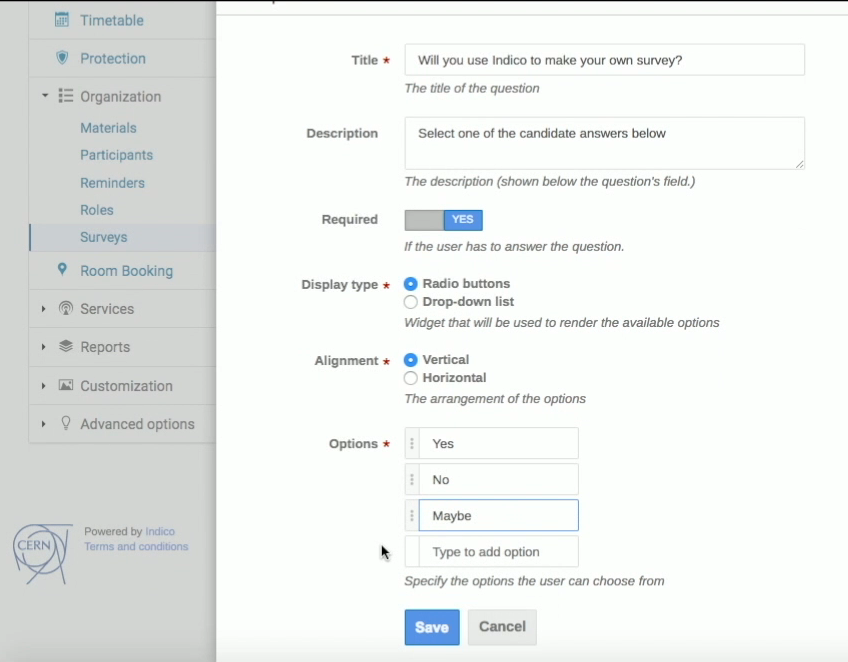
Type the question in the Title box, for example "Will you use Indico to make your own survey?" and add a Description if you need to, for example: "Select one of the candidate answers below", then indicate whether you want the answer to this question to be Required in order for the survey to be effectively submitted.
Select whether you want your options to be displayed as Radio buttons or a Drop-down list. If you choose radio buttons, indicate whether you want them displayed Vertically or Horizontally.
Type in the Options that you want your participant to choose and click on Save once you are finished. The figure below shows the above options selected:
Now that you have created your Section, you can change the order of presentation of your question and item. To do this, you can drag your question or item by using the grey rectangle that will appear on the left.
You can do the same with your entire section, by dragging it using the grey rectangle at the top.